Showing posts with label DIY. Show all posts

Thursday, 3 July 2014

Tobacco Cabinet Reveal


Now that this little tobacco cabinet is finished, I look at the before photos and I can hardly believe it started out in such rough condition.


I knew it had potential to be beautiful, but I have to admit that I didn't believe it would turn out SO well! I was thrilled with the results and even now, a few weeks after completing it, I stop and admire it every time I walk by. It is one of my favorite pieces in our home now . . . and it started out looking so shabby.


I sanded the veneer away and applied a coat of Minwax Dark Walnut stain just to tone down the orange wood. I topped it off with a coat of hemp oil from Miss Mustard Seed. You can see it still absorbing into the wood in the photo below but even so, what a dramatic difference!


For the rest of the cabinet I applied Miss Mustard Seed's milk paint in typewriter and gave it a light sanding. I topped it off with two coats of Miss Mustard Seed's furniture wax for a protective finish; the black paint looks amazing and buttery once the wax is applied!


I am so happy with how this piece turned out - I love that it has family history attached to it, and that I was able to make it "me" without compromising it's natural beauty.


The wood top has such amazing detail that I don't want to put anything on it that will cover it up! I am sure it will be loved in our home for a long time and I hope to pass it down to my own girls one day. Pieces with a story  like this are too special not to share!


Sharing at Miss Mustard Seed

Tuesday, 17 June 2014

An Antique Tobacco Cabinet


A few weeks ago, my husband went to his grandmother's house to help her prepare for a garage sale. He came home a few hours later with some cardboard boxes of children's books, old magazines, some random craft supplies and a treasure; an old side table they had uncovered down in the basement while sorting through things in storage.


This cabinet originally belonged to her grandfather . . . making it my husband's great-great grandfather! A true family heirloom and it was very generously passed on to me; being known for restoring furniture does have it's perks!

I was so thrilled to hear a bit of backstory about this piece. David's grandmother says she can remember it being in her grandfather's house when she was young and that he kept his tobacco and rolling papers inside of it. I am not sure how she came to own it, but it has been stored in her basement for a long time and all but forgotten about, probably because it is in rough condition.

My own family has very little in the way of heirlooms and antiques. My grandparents moved to Canada when my mom was just a little girl and they didn't bring a lot with them - and the few family treasures that do exist have to be doled out among the very large extended family . . . meaning I have never had the experience of owning something that has been passed down through the generations.

When I married my husband, I discovered that his family is bursting with these sorts of things! There are many, many family heirlooms and my mother in law has been incredibly generous with passing most of hers along to me. She saw my passion for vintage pieces and decorating with things that hold meaning, and began giving me gifts of family heirlooms, my engagement ring being one of them. One day I will do a blog post sharing some of the amazing things that I now own thanks to my generous mother in law! It has been so wonderful to "tap in" to a family that has so many pieces with stories behind them.


Despite being quite weathered and worn, this cabinet is still solid. When the door is opened there is still a faint smell of tobacco, which for a girl like me who adores pieces with family history was enough to make me get teary eyed.


The veneer on the top was very damaged; much of the finish is long gone and it was scarred with water spots. I wanted to try to keep the top of the piece natural wood; what a shame to paint over something that was obviously once a beautiful piece with nice detail. Although I knew I would give the body of the cabinet a coat of paint, I was determined to find a way to salvage the top.

The tobacco cabinet, as it's now referred to, sat in my garage for a few weeks before I got up the nerve to touch it. I wanted so badly for it to be perfect that I was afraid to start!

Yesterday the sun was shining and I had an entire evening devoted to working on furniture in the driveway and so I took the plunge and refinished it.

And it looks amazing. Just like I had hoped it would.

It is waiting patiently for me to have the time to do a coat of wax and apply some sealant to the top. As soon as it's finished I will share photos. . . it looks amazing!


Thursday, 12 June 2014

It's the Process, not the Product


My house is far from perfect. And I'm not talking about dirty dishes and laundry piles (although I have plenty of those too), I'm talking about the actual house. The renovations, the DIY projects, the repairs, the furniture and decorating.

I have blue bathtubs.


 My bathroom floor is swelling and lifting all around the toilet (TMI I know but I'm being honest here). The entryway tile is cracked in several places and the grout is chocolate brown colored, but it's supposed to be beige. I have a hole cut in my wall where a pipe burst two winters ago, and it's still not patched and painted over. My kitchen countertop is from the early 80's and it's gold fleck suface is covered in holes and cracks and scratches. I have a spare bedroom that is still painted the spiderman-esque red and blue that was left behind by the previous owner's teenage son.


We have lived in this house 2 1/2 years, and we have so far to go. Some times I look around and I feel like we will never get it all done. Aside from a couple of rooms,  I really don't feel like this house reflects "Us" or our style much at all. And I'm a firm believer in having a home that is meaningful and reflective of the people who live there.

I have moments where I feel frustrated with the process. I admit, I've had fantasies about winning the lottery and hiring a designer to make my home beautiful from top to bottom in a matter of weeks. Who wouldn't love that?

But then I come back to reality, and I remind myself of some other things that I believe when it comes to houses.


 -  I believe that homes should be personal. Should be real. Sure, if I wont the lottery I could buy out Pottery Barn and have a beautifully staged home tomorrow. But that's all I would have. A staged home that looks like a page out of the Pottery Barn catalog.

 Real homes should be filled with things that have meaning and are special. A bookshelf full of items rounded up on a Homegoods spree just doesn't convey the same warmth and realness that a bookshelf full of items collected over time does. Sure I could run to the home improvement store and buy everything I need to renovate my bathroom in one shopping trip, but would it be nearly as loved as a bathroom that took two years to renovate and countless hours of searching for "just the right" things would? Certainly not.

There's nothing wrong with Pottery Barn, and I own several things from there and will continue to shop there. But if all you have is room full of hastily purchased, mass produced items from a chain store then your home will always be lacking personality. Lacking realness.


 - I believe that taking time to source out the right supplies and find just the item I imagined is more important than sticking to a timeline. Sometimes I have a specific idea in my head, or even an inspiration photo, of how I want a space in my home to look. In our last two houses, I would start out with an idea and quickly compromise. The store wouldn't have any tile in stock that was similar to what I wanted, so I would settle for something that was "nice" or "good enough". I would set my heart on something and then discover that it was out of my price range, so I'd compromise by purchasing something that I didn't really like but was in my price range.

Now that we are in our long-term house, I have learned not to settle. I don't mean that I buy everything I want regardless of the price; we are on a budget and I can't just blow the bank in order to have an overpriced item just because I want it. But I have learned that if I have patience, I can almost always find what I am looking for at a price point I can afford. 

When we were doing our bathroom renovation, I had my heart set on square white sinks. The local stores didn't have anything square, and the next town over had some Kohler sinks exactly like what I wanted but were triple what I was willing to pay.

So I waited. I searched online regularly, I browsed home improvement store flyers. I stalked Overstock. I had some online friends keeping their eyes open. 

It was frustrating to have to wait. We had removed the medicine cabinet, painted the ceiling and the walls, ordered the countertop. All we were waiting on before we could finish it off were the sinks. It was tempting to just settle on some round sinks and get the project over with, but I knew that I wouldn't be happy with it in the end; I had my heart set on square sinks.


And then one day I was making a purchase on Amazon and before I checked out, on a whim I typed "Square white sink" into the search function. 2 minutes later, I had ordered the perfect sinks at an amazing price with free shipping right to my door.

Our bathroom renovation stretched out to an almost 5 month long process. We could have finished it easily in a few weeks, but we took the time to source out just the right materials and not compromise. And I love it! I am so glad we lived with a half-finished mess of a bathroom for the time we did; it was all worth it in the end.


 - I believe the real value is in the process, not the finished product. In college I took a course on teaching art for children and our instructor drilled this concept into us. It's not about how perfect the finished product looks - it's about how you get there. It's about the experience of creating, of exploring, and learning. Figuring things out as you go along, adjusting, testing.  At the end what you have isn't as important as the experience you HAD creating. 

I find that I get the most enjoyment and satisfaction of the projects that I did myself. I feel most happy with the things that were the hardest to figure out, or took the longest to finish. If someone came in and created my perfect room for me overnight, I would enjoy it, sure . . . but I wouldn't look at it and say "Remember when we built that?" and "Remember when we brought that home from a yard sale and I had to sit with my knees on the dash so it would fit?" 

The stories wouldn't be there. The memories, the pride of accomplishment wouldn't be there. Sure it would be a beautiful room but I know I wouldn't love it as much as if I had brought that room together myself slowly over time.

The experience of creating your dream home is a big part of what makes your home your dream home. Enjoy the process. Don't rush it along just to have a "finished" room. So what if you have to live with shag carpeting for another six months until you find the perfect hardwood flooring? In the end you will have the look you wanted and the thrill of finding just the right item, at just the right price. There's nothing like it! It's an easy trade off for a few extra months of living with that shag carpeting because you will forever enjoy the results of your hard work and perserverance.


I won't say that I am completely content to wait and have my house evolve over time. I get frustrated and I want things to look pretty; it's actually stressful for me to live with things that aren't visually pleasing because I am such a visual person.

I have my moments of wishing I could just jump into the pages of a Pottery Barn catalog, sure. But then I look around my home and I see all the stories that are in every piece. The memories attached to all of the rooms that we have worked on. And I wouldn't trade that feeling for anything. I just wish I could hurry it along just a little bit!

Spiderman room, I'm coming for you!


Monday, 2 June 2014

Bathroom Source List


I had a request to share a source list for our bathroom (partial) renovation, so I complied a list of all the products and where you can find them.


The vanity is painted with Aura paint from Benjamin Moore, in the color Metropolis.


The shower curtain is from West Elm, you can still get it here

The sinks are from Amazon (I know, right. You can literally buy everything AND the kitchen sink there)


Countertops are Formica brand laminate. We chose the Calcutta Marble look-alike and it has been our favorite part of the renovation so far! We went with an ogee edge which was an extra cost, but it adds a bit of flair and makes it look more like stone in my opinion. And we saved some money by installing it ourselves, so the cost was still reasonable.


Faucets and towel rings are from Home Depot; they are the Boardwalk collection from Moen. 


The cabinet hardware is from Martha Stewart, via the Home Depot. We ordered these online when Home Depot was having a free shipping deal and they came right to our door a week later!


Soap dispensers are from Target. I got them on clearance a while back, so I am not sure if they still carry them.

I hope that answers any questions! If you would like any more information, feel free to leave a comment or email me directly.


Thursday, 29 May 2014

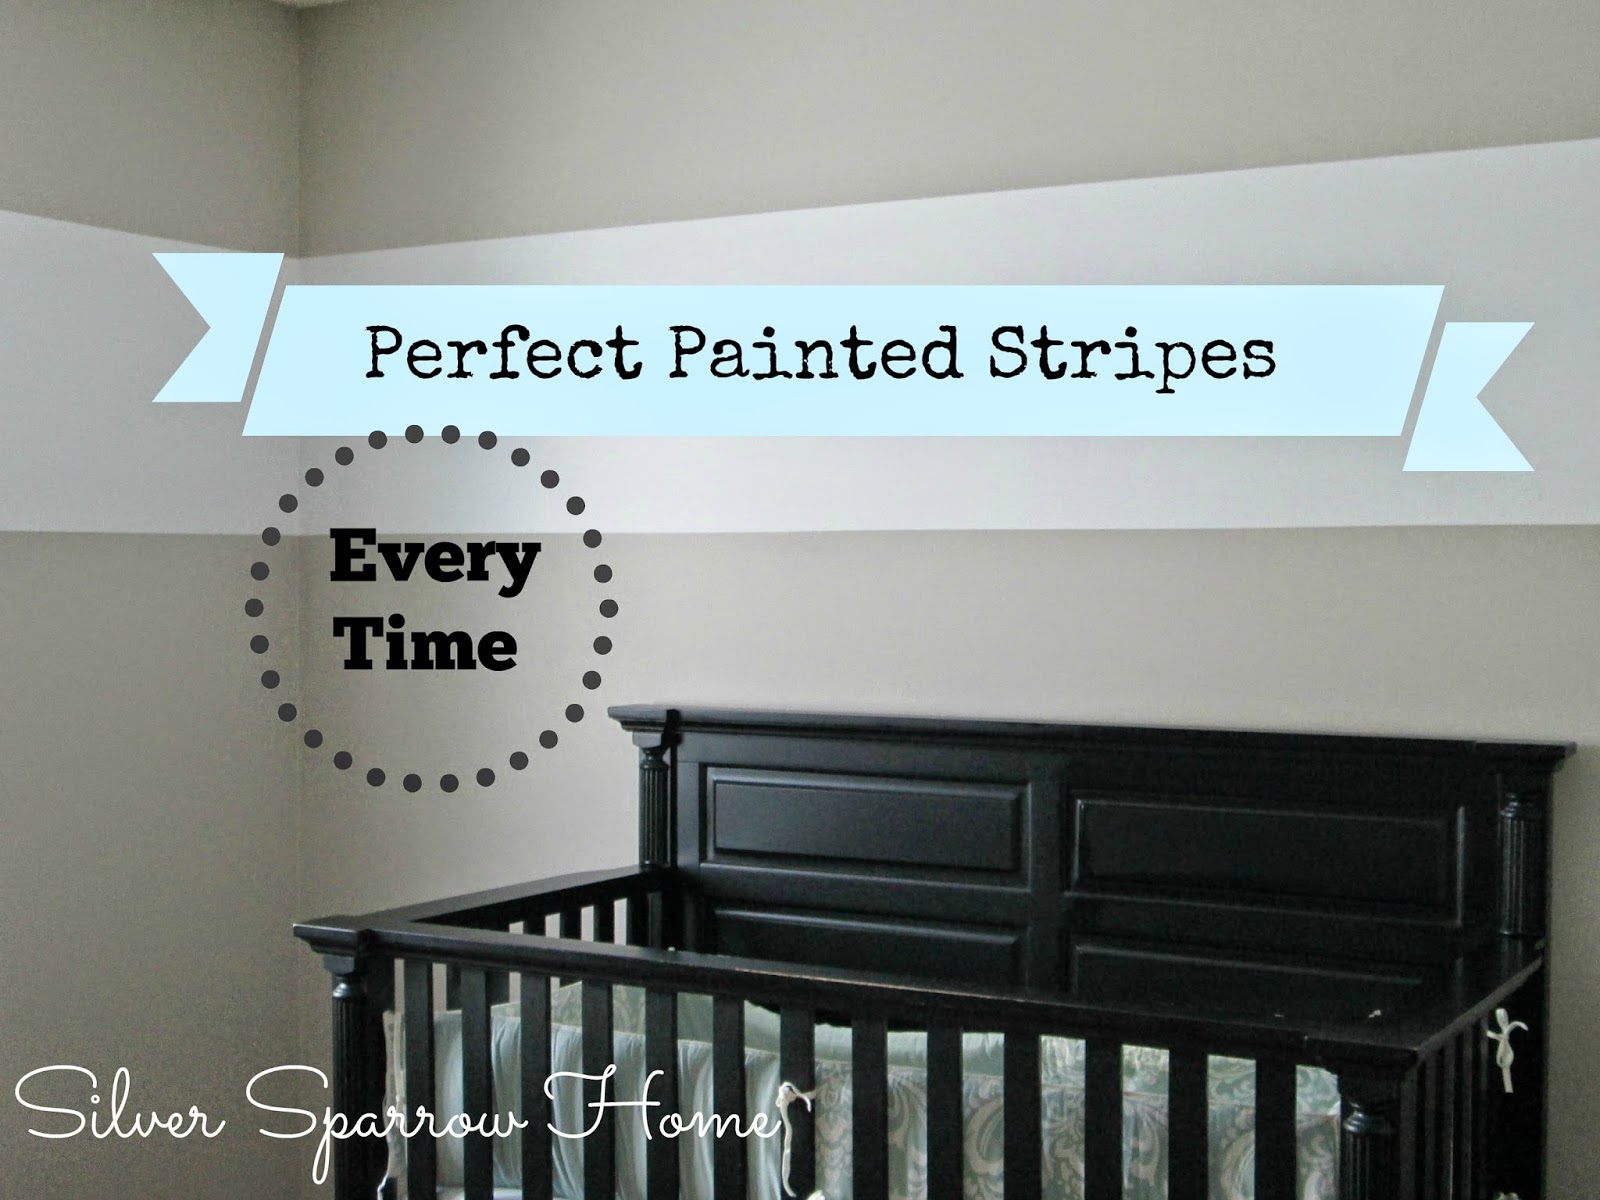
5 Tips for Perfect Paint Lines . . . Every Time


When we moved into our house, the second bedroom was . . . a little . . . bright.


It was painted lime green and bubblegum pink - including the closet doors! It's a fun choice for a little girl, but it really wasn't our style and was much too bright for me. 


It quickly became a dumping ground for unpacked boxes, our daughter's crib when she outgrew it, and random things we just didn't know where else to store. I think partly because it was an empty room we didn't have a need for, and partly because we always kept the door closed anyway due to the blinding paint colors, so we felt it was ok to pile up things we didn't want people to see either.


It wasn't until our second daughter was on the way that we finally decided to clear out the room and tackle the paint job. I chose one of my all-time favorite colors - Revere Pewter by Benjamin Moore. It's a soft grey, but in this room it reads much warmer, almost a tan.

I was inspired by the Sweet Lambie nursery from Pottery Barn, to try adding a stripe horizontally around the room. While I like the stitched detail on the inspiration photo, I wanted to keep mine simple both because of time and because I just like things simple. I felt like a wide stripe running around the room would be "busy" enough for me without adding any more detail to it.


My husband patiently did all of the calculating, measuring, and marking out where the stripe needed to be, and we worked together to apply the painter's tape. 


I have worked with painter's tape several times in the past and  I was determined to get a nice sharp line so I wouldn't have to go back with an artist's brush and do touch ups. I've learned a few tips and tricks that help with getting that crisp line over the years, and I thought I would share them.


5 Tips For Getting A Perfectly Crisp Tape Line

1. Make sure the paint you are applying tape over is cured. Not dry, cured. Paint feels dry to the touch very quickly, but it's not fully cured. It may feel dry, but it won't hold up to hard scrubbing, bumps, or applying painter's tape very well. Every source seems to have a different number of days they recommend to allow paint to cure - anywhere from 5 to 30 days. I usually allow about a week to ten days, mostly because I'm impatient and because that seems to be plenty of time as long as the room is well ventilated and warm.


2. After applying the tape, go over it with a credit card or a rubber scraper. Very gently, just to remove any air bubbles, wrinkles and to get it nicely adhered.


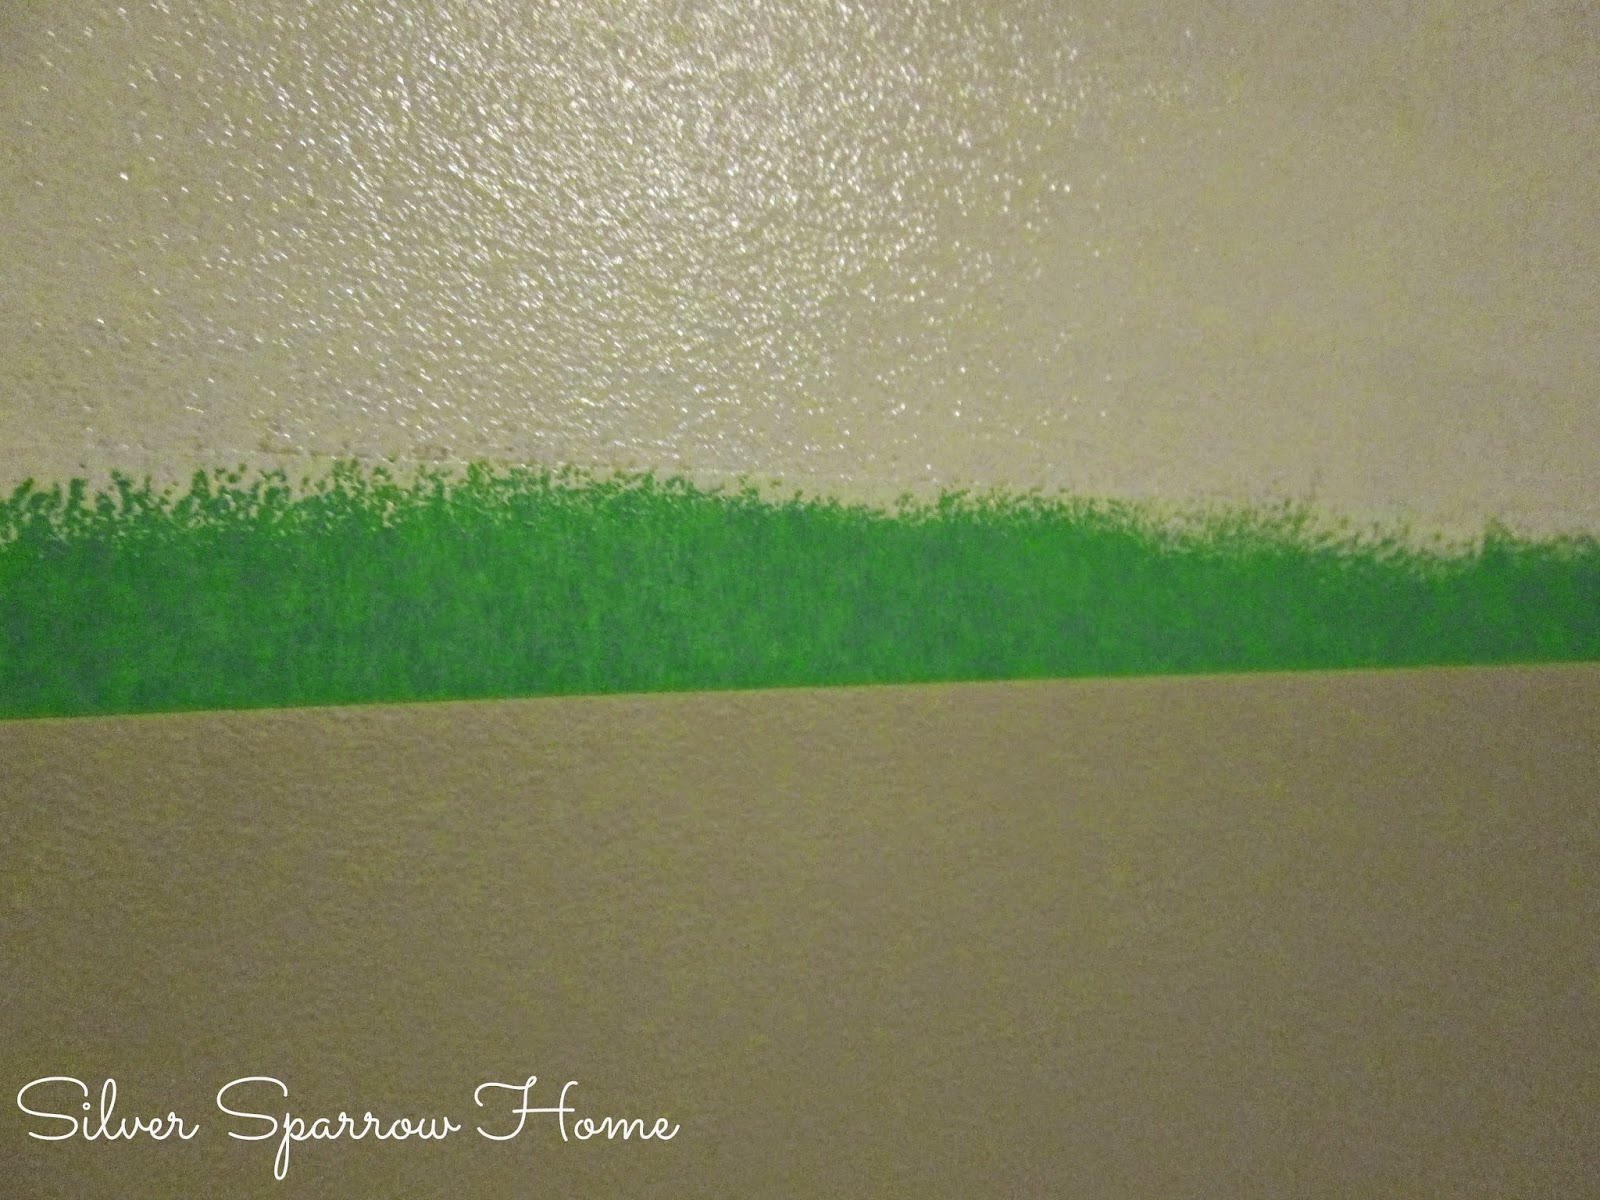
3. Apply a thin coat of the base color over top of the tape. In my case, it was the Revere Pewter. 
This seals off the tape and ensures that any bleedthough that happens is the wall color anyway . . . so, eliminating bleedthrough altogether!


It looks lighter in the photo above because it's wet paint, but here you can see I applied a layer of the wall color over the tape to help seal it off before applying the white.


4. Apply your second paint color ( in my case it was Decorator's White from Benjamin Moore) and while the second coat is still wet, remove the tape. Don't wait for it to dry! 


5. When pulling the tape, pull toward the wet paint and not away from it. When removing the tape below the stripe, I pulled in an upward motion. When pulling the tape on top of the stripe, I made sure to pull in a downward motion, toward the wet painted stripe and NOT toward the dry wall color.


All of these little tips help to give you the crisp, straight lines that painter's tape is supposed to give. So often people complain that tape doesn't work, or that it bleeds through, when really it was their lack of prep work or not following these steps that gave them a bad result and had nothing to do with the tape itself.

When I removed the tape, sure enough I had perfectly crisp lines with zero bleedthrough! I did a little happy dance surrounded by giant balls of wadded up painter's tape when it came off so perfectly!


I finished off the room by adding some homemade artwork and a DIY crystal mobile, the directions for which I found here.


I love how it turned out; I think aside from her DIY name art, the stripe is my favorite part of Emma's room. And the best part is that all it cost me was a quart of paint!


Monday, 26 May 2014

Vintage Glam Bathroom Makeover - Phase 1

When we purchased our home two years ago, it definitely was NOT for it's beauty!


We actually fell in love with the location, the huge lot with the fenced yard, the layout, and the fact that it had a second kitchen on the lower level making it perfect for my home daycare. We loved the huge paved driveway, the garage, the neighborhood. The size was perfect for our needs and it had a large laundry room and a master ensuite which were two of the biggest things on my "dream home" list.


But beautiful? Updated? My style? This house is none of those things.


It didnt scare us because we are seasoned DIY'ers and home renovators. We actually enjoy the hard work that comes along with transforming a house and I love having the ability to make all the choices myself when it comes to finishes, rather than buying something that was someone else's taste and not being able to change it because it's perfectly good, just not my taste.


This is how the bathroom looked the day we moved in. Not TERRIBLE, but definitely not our style. And we lived with it like that for a while.


We did really enjoy having double sinks for the first time, but that was about all we enjoyed. The walls were painted that 90's country blue that was popular when people decorated with geese and wooden hearts. All the 80's golden oak has aged into an orangey toned, greasy looking finish and the floors were bubbling up around the toilet.


Did I mention it also has a blue tub? Oh yes. Yes it does.


One night after the girls were in bed we were discussing what we wanted to do to the bathroom. We planned out a 2 phase renovation hastily scribbled on some notebook paper.


Phase 1
-Replace the sinks and countertop. Remove the oak "tower" on the counter as well
-Scrape and paint the ceiling
-Remove the medicine cabinet and replace with two inset ones
-Move the outlet to be centered , replace the switchplates, get a new fan control and fan cover
-Paint the cabinet and get new hardware
-Paint the walls
-Hang art, build a shelf with hooks for towels 


This would leave us with a very pretty looking bathroom, as long as the shower curtain was closed. It would be a huge facelift that would help us to enjoy the room a lot more until we could afford to do the more expensive projects.


Phase 2
-Remove the blue tub, tile the walls and install a new bathtub
-Tile the floors (possibly also adding heated floors)
-Replace the window
-Replace the toilet
-Replace light fixtures


And suddenly, we went from dreaming on paper to ripping down a medicine cabinet and getting out the sledgehammer! Did I mention this was at midnight? 


The next morning when I got out of the shower and had no mirror to help me get ready, I made the comment that maybe we didn't think this through and should have waited to start demolition. I mean, we hadn't even ordered new medicine cabinets and I had no idea what I wanted to use for countertops! My search for square sinks had not turned up a single one that fit in our budget. I felt a big case of renovator's remorse in the cold light of day, standing there wrapped in a towel looking at a blank spot on my wall and a countertop littered with tools.


My wonderful husband listened to my stressed-out ranting, and then calmly helped me tote my blowdryer and all my makeup into our other bathroom where we did still have a mirror. He assured me that we would have new medicine cabinets in no time, and it would all be worth it in the end. 


That evening I came upstairs and burst out laughing.


After he taped out where we needed to make cuts for the inset medicine cabinets, my husband thought he'd make me some temporary ones to keep me happy! 


I spent all my spare time researching the best price for the faucets I wanted, trying to find hardware I liked, and ordered medicine cabinets that were super expensive but we both decided were worth the splurge.


 It took us longer than anticipated because of a pretty big health scare with my husband that occured shortly after we started, but we did get phase one finished! 


Ok, almost finished. I still haven't found the perfect artwork and the shelf with towel hooks still hasn't been made yet . . . 


We are thrilled to finally be proud of our bathroom and not cringe whenever a guest asks us the dreaded "Can I use your bathroom?". It really feels more like US and less like where the trends of the early 90's came to die. 


Juuuust as long as you don't peek behind the shower curtain!


Friday, 23 May 2014

My Favorite Local Shop

I can't believe it's already been a year since I took a leap of faith and emailed a local shop owner asking if she would take a chance on me.


For some crazy reason she said yes, and I've been selling things from, and working in, Goat River Folk Art ever since.


It's a beautiful, creative store filled with one of a kind items that have been rescued from a landfill, repurposed, reinvented, or created from scratch by one of the amazing ladies who work there. Each one of us have a distinct style and our own "look" but blended together, it makes for a fun shopping experience and there is always something for everyone.


It's full of antiques, vintage finds, and lovingly refinished furniture. All at amazing prices that anyone can afford. That's what I love most about the store and it's owner - they believe in having a store that is for the "Everywoman" - the single mom on one income, the stay-at-home mom, the single person just starting out . . . those are our biggest clients and all of them come to us because they know they are getting a good product at a GREAT price.


The store is always changing, ever evolving. Always beautiful. Always affordable!

Tuesday, 20 May 2014

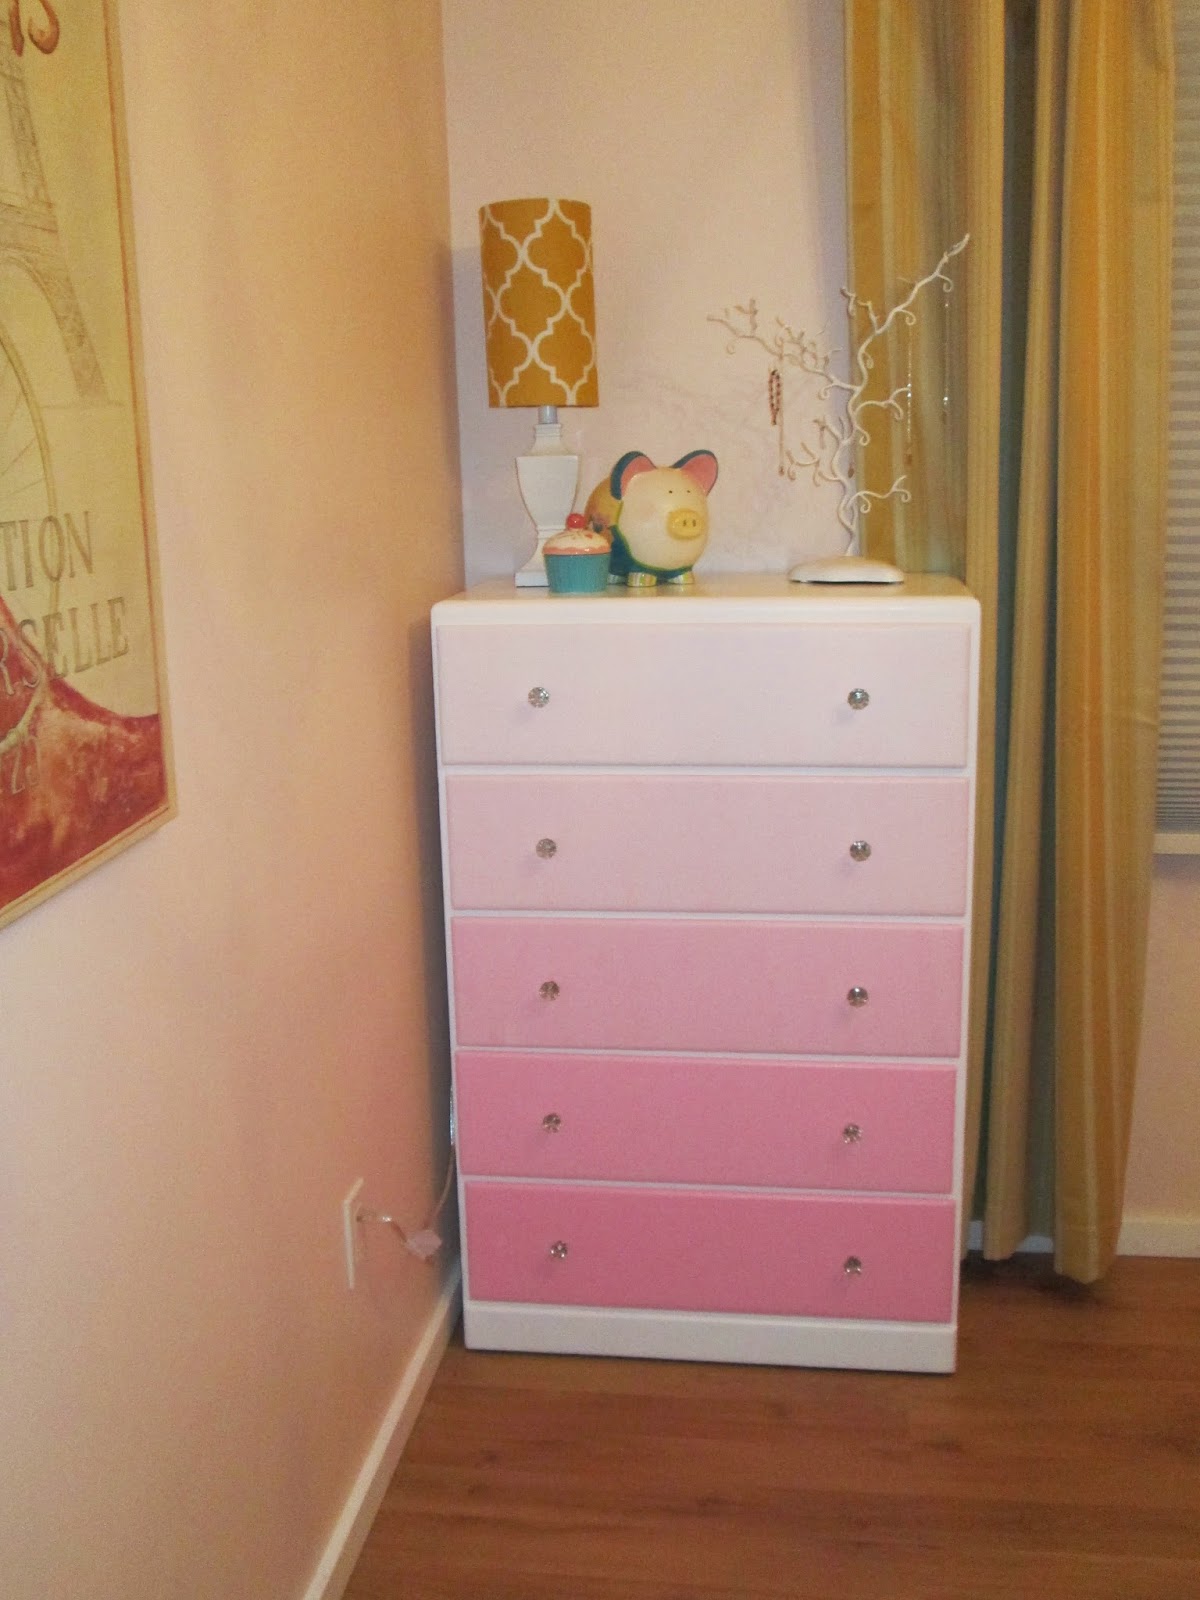
A Pink Ombre Dresser


Last year, my sister called me out of the blue and asked if I wanted an old dresser that she no longer had any use for. It had been in her son's bedroom but he didn't have room for it anymore. I said yes, thinking I could use it in my daughter's room as she was outgrowing her nursery furniture and we had a baby on the way that would soon be needing it anyway.

When she dropped it off, my sister explained that the dresser had been hers growing up and I remembered it being in her room. At that time it was painted a light blue with some pink and white flowered knobs. She said she had memories of it being a "dress up" storage piece in our basement before that, and it had been painted bright crazy colors and was filled with our old halloween costumes and kept under the stairs next to our deep freeze. I only vaguely remember it but by the time I was very old, it had been repainted and put into my brother's bedroom, and then later, into my sister's with yet another new paint job.


I thought that was a nice piece full of memories and it would be special to have in my daughter's room, seeing as at one time it had been in the bedrooms of all 3 of my siblings and also my nephew.

It sat in the garage for about six months before I finally got around to painting it. When I began working on it I mentioned it to my mom. She told me that the dresser had been purchased by my grandparents when my mom was born for HER nursery. She said that it had been her dresser all her life growing up and had come with her when she got married. It was shifted around the house over the years, each time with a new coat of paint . . . in my brother's room, then in the basement as the makeshift "Tickle Trunk", then into my sister's room who also took it with her when she got married.


I was so thrilled that it came back around to me - how special that the same dresser that housed my mom's baby clothes is now the dresser where my daughter keeps her socks and Cinderella pyjamas. I think about it almost every time I open the drawers.

I can't even imagine how many coats of paint have been layered on it over the years. It's not a fancy piece, but it's sturdy and solid and in great condition. And full of memories. I have a feeling that one day my daughter will be lugging it out the front door, probably painted a totally different color and moving it into a house of her own.


And when she does, I can tell her "Did you know this dresser was your Grandma's when she was born?"
And that's something you can't buy at a furniture store.

I painted the dresser white, and did a pink ombre on the drawers. It's definitely not my usual style, but I had been wanting to try the ombre look for a while and I have also been trying very hard to let my daughter's room be her own space. She loves pink, and I wanted her room to be bright and fun, not feel like an extension of my own personal decorating style. I feel like it's important to let both my girls express their personality and have some say in the decorating decisions in their rooms.


Does that mean I would be ok with hot pink walls or My Little Pony bedding? No. I'm just not ready to let go of that much control and I readily admit it. But I try to allow her to make the decisions, even if I am limiting her choices somewhat or guiding her toward a general idea of what I am "Ok" with.

She asked for pink, and pink it is. Having a bright pink dresser would make me feel agitated and panicky every time I stepped into the room, so painting it out white to match the rest of her furniture and limiting the bright color to the drawers makes it more palatable for me. And the cute glass knobs don't hurt either!


Wednesday, 14 May 2014

No.3 Chair


Numbered furniture. Either you "get it" and love it, or you don't understand it and think painted numbers ruin an otherwise great piece.

I'm in the former camp. I think painted numbers are adorable, and a fun way to personalize your home in a subtle way. Here are some of my favorite examples of numbers painted on furniture . . .


It's a fun way to bring in a bit of whimsy, and fits perfectly in a cottage, beachy, country, schoolhouse-inspired room, or with any style that incorporates vintage pieces. I like to call my personal style "Refined Cottage" and pieces like this make my heart sing.

I tried my hand at a numbered piece last summer. Sadly I didn't take a before photo, but it was your run-of-the-mill honey colored oak chair with a stain that had gone orange over the years and was in need of some freshening up.

I painted it my favorite shade of blue and then stenciled on a big number 3. I had fun distressing it to create the look of a well worn, old chair by focusing on the areas that naturally see wear; the seat, corners, fronts of the legs and the center of the back.


It turned out so beautifully and was fun to bring in to the shop because everyone had an opinion on it. Most people would gasp and say "Aw!" Or "I love that, how cute!" but a few people were puzzled and made comments like "Now why would you put a number on a chair?" "I thought it was perfectly nice until I noticed the number on the seat. That just ruins it for me."

Well, that's the fun of decor/design. Not everyone is going to like what you do, so just DO YOU. I love the look and I had so much fun creating this piece. It's not a style that is everyone's cup of tea, but that's not what I strive to do.


If I wanted to create pieces that everyone would like, all my things would be plain white. Or black. Adding personality to pieces like this is a risk, sure. It means less people will find it appealing. But for the ones who DO like it, it makes that piece irresistable and extra special.

So for all my numeral-loving clients out there, keep on the look out for more numbered pieces coming soon! And for those who just don't get this trend, don't worry. There's always something for everyone!
 
SITE DESIGN BY DESIGNER BLOGS